
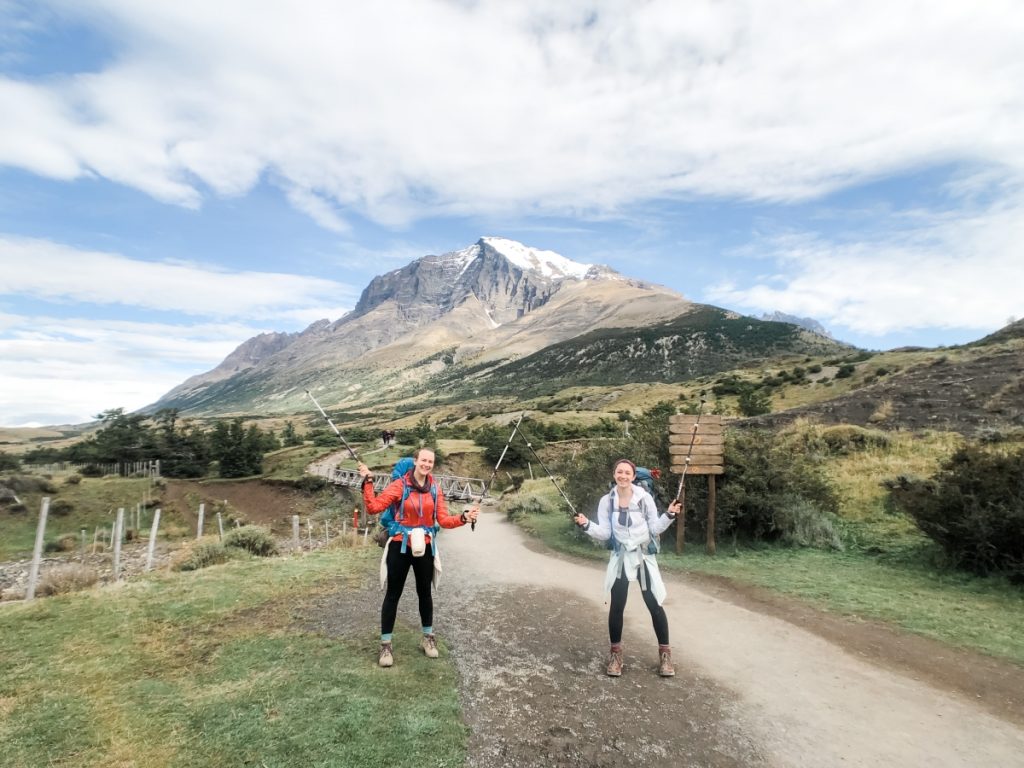
Patagonia was at the top of my bucket list for 5 years before I finally thought — what’s stopping me? I’ve been lucky enough to save up for a big trip a year, so why haven’t I chosen to go to the one place I tell everyone I’m dying to go? So I booked it. The trip was 9 days in total including a layover in Mexico City, 2 days in Santiago, 2 days in Puerto Natales, and a 5 day backpacking trek through Torres Del Paine’s W trail.
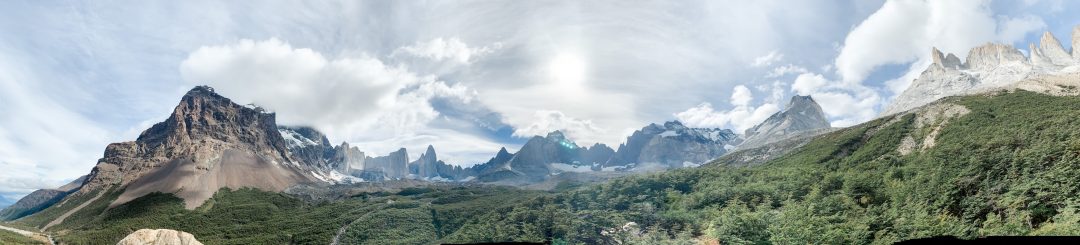
W Trek Overview
Total Distance: 100 km
Days on the Trail: 5
Starting Point: Refugio Paine Grande (start and end point can be reversed)
Ending Point: Hotel Las Torres
Highest Point: 900 m (Mirrador Las Torres)
Accommodation: Campsites (options to stay at refugios (hostels) and/or hotels)
Permits Needed: Entrance fee (21,000 CLP), overnight confirmation for campsites / refugios / hotels in advance
Day 1: Seattle to Santiago
Getting to Patagonia is not an easy trek on it’s own, let me tell you. We took 3 planes, 1 bus, and 1 boat to get to the start of the trail head. Day 1 was just a full day of flying — our first leg beginning at 11:30 pm was SEA to MEX, a four hour layover, then MEX to SCL where we landed at 9:30 pm the next day. After traveling so long and landing at night, we decided just to stay at a hotel at the Santiago airport, so we could easily get back for our 11 am flight the following day.
Day 2: Santiago to Puerto Natales
We had one more quick and easy 3 hour flight between Santiago (SCL) and Puerto Natales (PNT). Keep in mind that flights from SCL to PNT do not run every day, so this will have to line up with your dates to work this way, but it is the closest airport to the Torres del Paine national park. If you can’t fly out of PNT, you’ll want to fly into PUQ (which is where we flew out of at the end of the trip), and it just requires an extra bus trip to get to Puerto Natales.
We arrived in PNT at 2 pm, which was too late to start our trek into the park, so we wandered the small town for the afternoon and spent the night in El Patagonico Hostel — which was cute, small, and full of other backpackers on the same trek. We booked our bus ticket for the next morning by walking to the central station (more details in day 3).
Day 3: Getting to Torres del Paine National Park from Puerto Natales, Puerto Natales to Grey Campsite
Hiking distance: ~11 km
So this is where the planning starts to get a little bit trickier, getting to the national park isn’t hard, but it does require knowing your transit options. There are three different companies that travel to the national park each morning, and cost around $23 USD for a RT ticket. If you’re traveling in peak season, try to book this ticket at least a day in advance.
7:30 am: Buses leave from the bus station (walking distance from our hostel, and most of the small town) and they take you to Laguna Amarga.
9:45 am: Arrive at Laguna Amarga – pay your park entrance fee and receive a map of the park around 9:45 am. You will need the $21,000 CLP in cash, since the park doesn’t accept card payments. Bring a photocopy of your passport to prove that you’re a foreigner for the entry rate. After everyone pays for their park passes, the buses continue on to Pudeto at 10:30 am, which is where you can plan to start the W trek.
11:00 am: Ferry leaves from Pudeto to Paine Grande (where we chose to start our trek based on our camp sites)
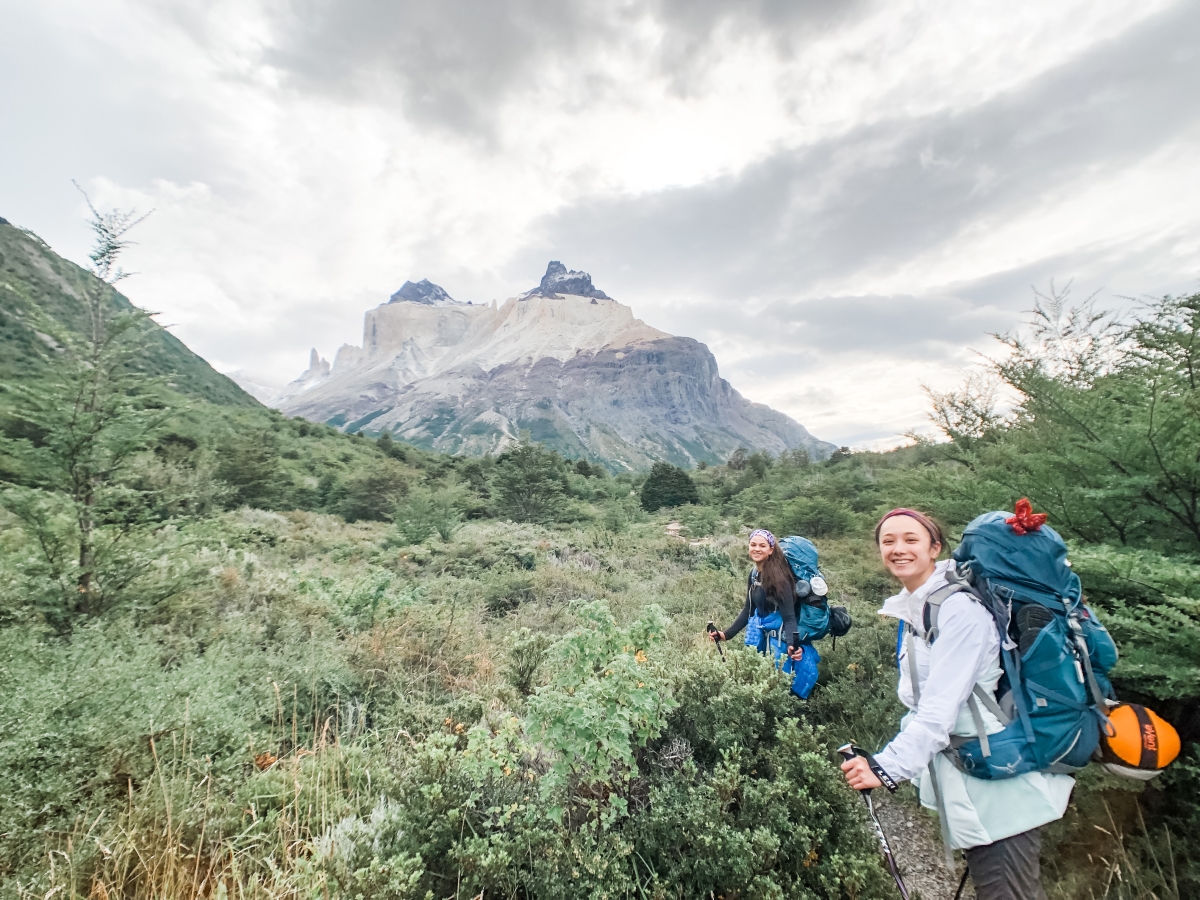
11:40 am: Arrive at Paine Grande and trek to Grey Campsite. The trail starts off uphill, but levels off with beautiful views of Lago Grey to keep you motivated on day 1.
4:00 pm: The hike to Grey Campsite should take around 4 hours. Check in to the Grey Campsite, pitch your tent, and cook dinner enjoying the first night on the trail!
Day 4: Grey Campsite to Paso and (back) to Paine Grande
Distance: 19 km
8:00 am: Wake up early to make breakfast and pack a day pack, then head out to Paso for views of Glacier Grey
9:30 am: After about 1.5 hours of hiking you’ll reach the former campsite with beautiful views of the glacier. You can decide to keep hiking in this direction, or turn around early to save yourself the extra KMs for the day. We ended up turning around at the first campsite after enjoying the views!
11:30 am: Make it back to Grey Campsite to pack up the big backpack and hike back to Paine Grande.
4:00 pm: The nightly routine: setting up camp, making dinner, and enjoying time in such a beautiful setting. Paine Grande has probably the most infrastructure of all the campsites we stayed at, and is surrounded by stunning mountains and water.
Day 5: Paine Grande to Francés
Distance: 15 km
8:00 am: Rise and shine! Today is one of the longer days if you’re planning on visiting the Britanico Lookout (which you should be). By day 3 on the trail we had our morning routine down — wake up, make oatmeal, pack up, and go!
9:00 am: Begin your hike to Italiano — this is one of the more difficult stretches of the trip, as it’s almost entirely uphill. We were lucky to experience beautiful weather, so it wasn’t painful, but I will give fair warning that I’ve heard getting to Francés Valley can be quite miserable under the wrong conditions.
12:00 pm: Estimated time to arrive at Campsite Italiano is 2-3 hours from leaving Paine Grande. Once you arrive to this campsite, you’ll notice a lot of backpacks stacked up around the ranger station. Pack a day-pack with essentials for a quick hike up to Britanico Lookout, and stash your large backpack with the rest.
Note: Italiano is a free campsite, so if you’re able to stay the night here instead of Francés, more power to ya! It will make the next day tougher though. And because it’s a free public campsite, the bathrooms and sites are quite a bit grungier than those in Francés.
3:00 pm: Plan for at least 3 hours to make the trek and back to Mirador Britanico. This is one of the most beautiful viewpoints on the W trek, and one you won’t want to miss! We were running behind on schedule this day and ended up having to rush to the top to make sure we’d make it to our next campsite before running out of daylight, don’t follow in our footsteps! One of my two friends ended up not making it to the final viewpoint, and spraining her ankle on the way down (which made for a very difficult next couple of days). Leave early, hike carefully, and make sure you plan to fit it all in!
4:00 pm: Luckily the trek between Campsite Italiano and Francés is quick and easy — a short 2km will take you to your campsite for the night.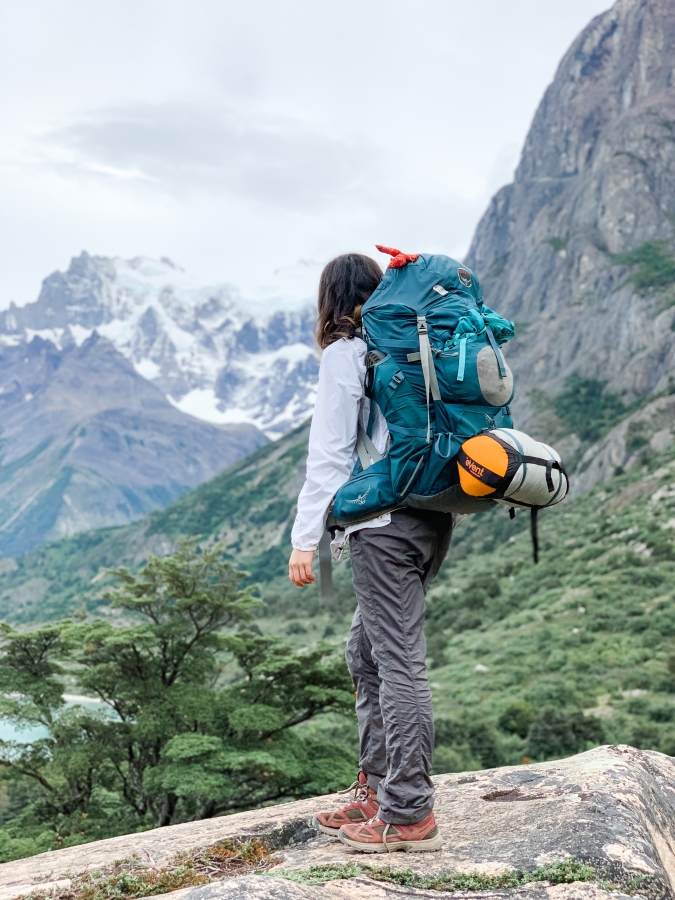
Day 6: Francés to El Chileno
Distance: 17km
8:00 am: You should be a pro at this morning routine by now!
9:00 am: Leave the campsite and begin the (long) trek to El Chileno! This day was probably the most mentally tiring for us. The trek to El Chileno is long and tiresome, and we were dealing with a sprained ankle. This trek follows along a lake and periodically gains and loses elevation until you reach the valley with a steady uphill climb to the campsite. We ended up splitting up with our injured friend at the start of the valley, so she could stay in a hotel overnight and wouldn’t risk the hike to the Torres the next morning.
4:00 pm: Arrive at El Chileno and check in to your campsite. You’ll want to pack your day pack for the trek to the Torres, as you’ll be leaving very early. Check in with the refugio staff on the time for sunrise so you can plan your last day.
Note: El Chileno campsite does not allow for the use of stoves/fire of any kind. The refugio kitchen has a small tank of hot water you’ll be permitted to use for free (even if staying at the campsite), so plan to bring food that can be heated with the water provided.
Day 7: El Chileno to Torres del Paine, and return to Puerto Natales (via Laguna Amarga)
Distance: 22 km
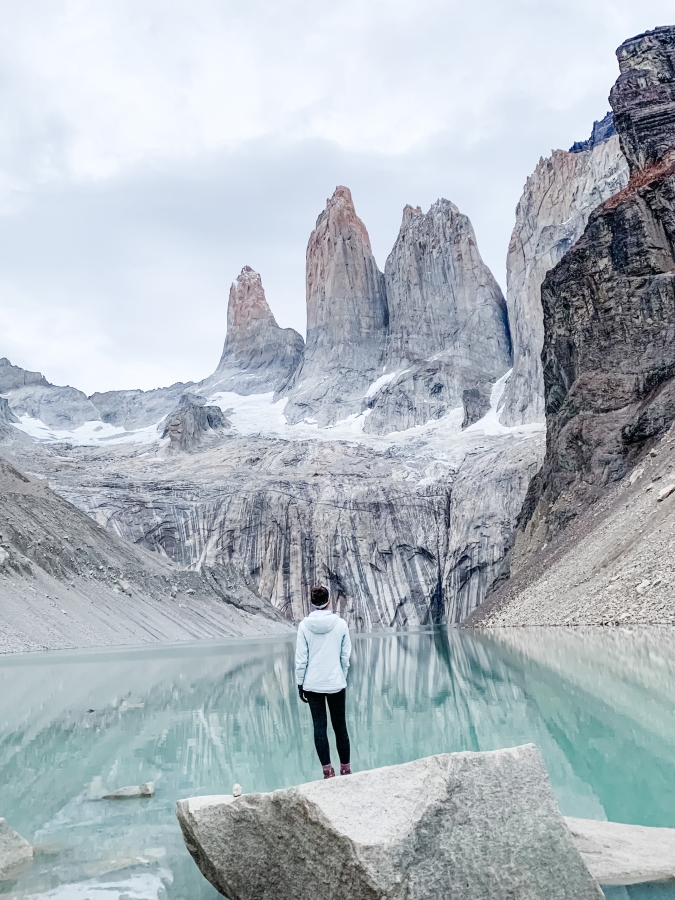
4:30 am: Your wake-up and hiking times may vary for this final day, depending on what time of year you visit and what the local sunrise is estimated to be. Plan for a hike of about 2.5 hours, and leave the campsite accordingly.
4:45 am: Begin your hike to the Torres — the moment you’ve been waiting for!
8:00 am: Start the trek back down from the Torres to make sure you have time to make the 2:00 pm bus from Las Torres Hotel to Laguna Amarga. You’ll need to return to your campsite, pack up, have breakfast, and begin your final descent. When you get to Las Torres Hotel parking lot, there’s a small ice cream shop that sells tickets for the shuttle ($4,500 CLP) that leaves at 2:00 pm. If you’d prefer to walk, it’s about another 1.5 hours to the Laguna Amarga Ranger Station (but to be honest we were exhausted, reunited with our friend with an ankle injury, and very excited about the shuttle option).
2:30 pm: Take the bus from Laguna Amarga back to Puerto Natales.
5:00 pm: Arrive in Puerto Natales bus station and celebrate! You just completed one of the most incredible backpacking circuits in the world, and you deserve a nice hot meal with a beer. We found a local restaurant, and stayed the night at El Patagonico Hostel once again before our return to Punta Arenas the next morning.
Day 7: Puerto Natales to Punta Arenas
To get back to Santiago for a couple of days of fun in the city, we took Bus Sur to Punta Arenas leaving Puerto Natales bus station at 6:30 am. We booked this ticket online in advance for $13.62 USD. From Punta Arenas, we took at 12:00 pm flight to Santiago airport, and enjoyed our last couple of days in Chile in the city.
The W Trek was my first major backpacking trip, and it really put us all to the test. More than anything, it was a huge mental challenge to keep hiking day after day, running on fuel of camping food and granola bars. That being said, it’s absolutely one of the most rewarding experiences I’ve ever had. I can say I hiked 100 km in the remote wilderness of Patagonia!

No Comments